Remember that unless a whole group of cars has spent the last 3-5 years in the same environment, there will be variation between cars in how they weather. Even within a group of cars in the same service, there will be differences in how the decks are weathered and how long each one has been out of the shop or last painted. Try not to have all your cars weathered exactly the same.
The deck of the F-50-series cars is molded in a neutral gray ABS plastic. No additional distressing of the deck is needed for newer or light to moderately weathered decks. The paint effects alone can do a lot to change the look of the car.

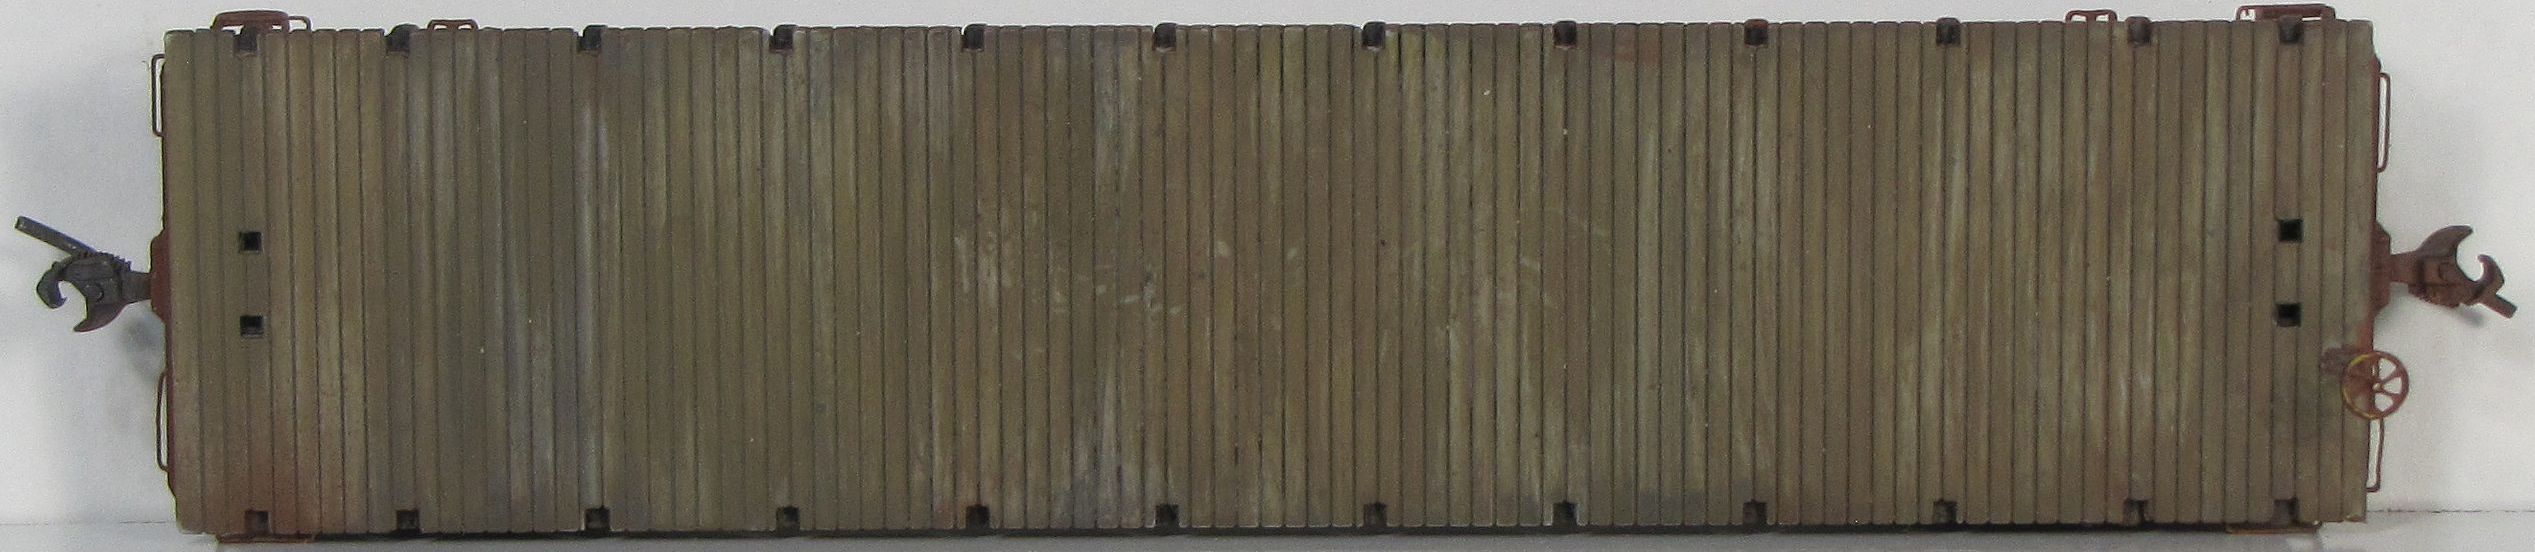
An example of a heavily scratched up deck on SPMW 1413 with paint weathering, no missing boards yet on this one though.
If exceptionally rough deck is desired, before building the car, distress the deck with a variety of implements including: a carbide scribe (best used for single scratches), a razor saw (drug across the deck so the teeth leave marks on the boards), or a rough (80-100 grit) sanding stick. This will replicate an old rough deck with splitting or cracked deck boards. Remember also that the blocking used to secure the loads was often nailed to the decks with blenty of D-nails or even bolted through the deck. When the decks became too chewed up, sometimes a few boards would be replaced or, if the whole deck was too bad, it would all be replaced.
The SP painting specifications call for the decks to be painted the same Freight Car Red as the rest of the car. However, the wooden sub-deck blocks, deck board ends, and especially the more abused deck tops will show different weathering, and a slightly different shade very shortly after they are painted. One option is to not mask the deck and allow the over-spray from painting the carsides to extend 1/8-3/16" or so out onto the deck, leaving the center portion of the deck the natural plastic gray.
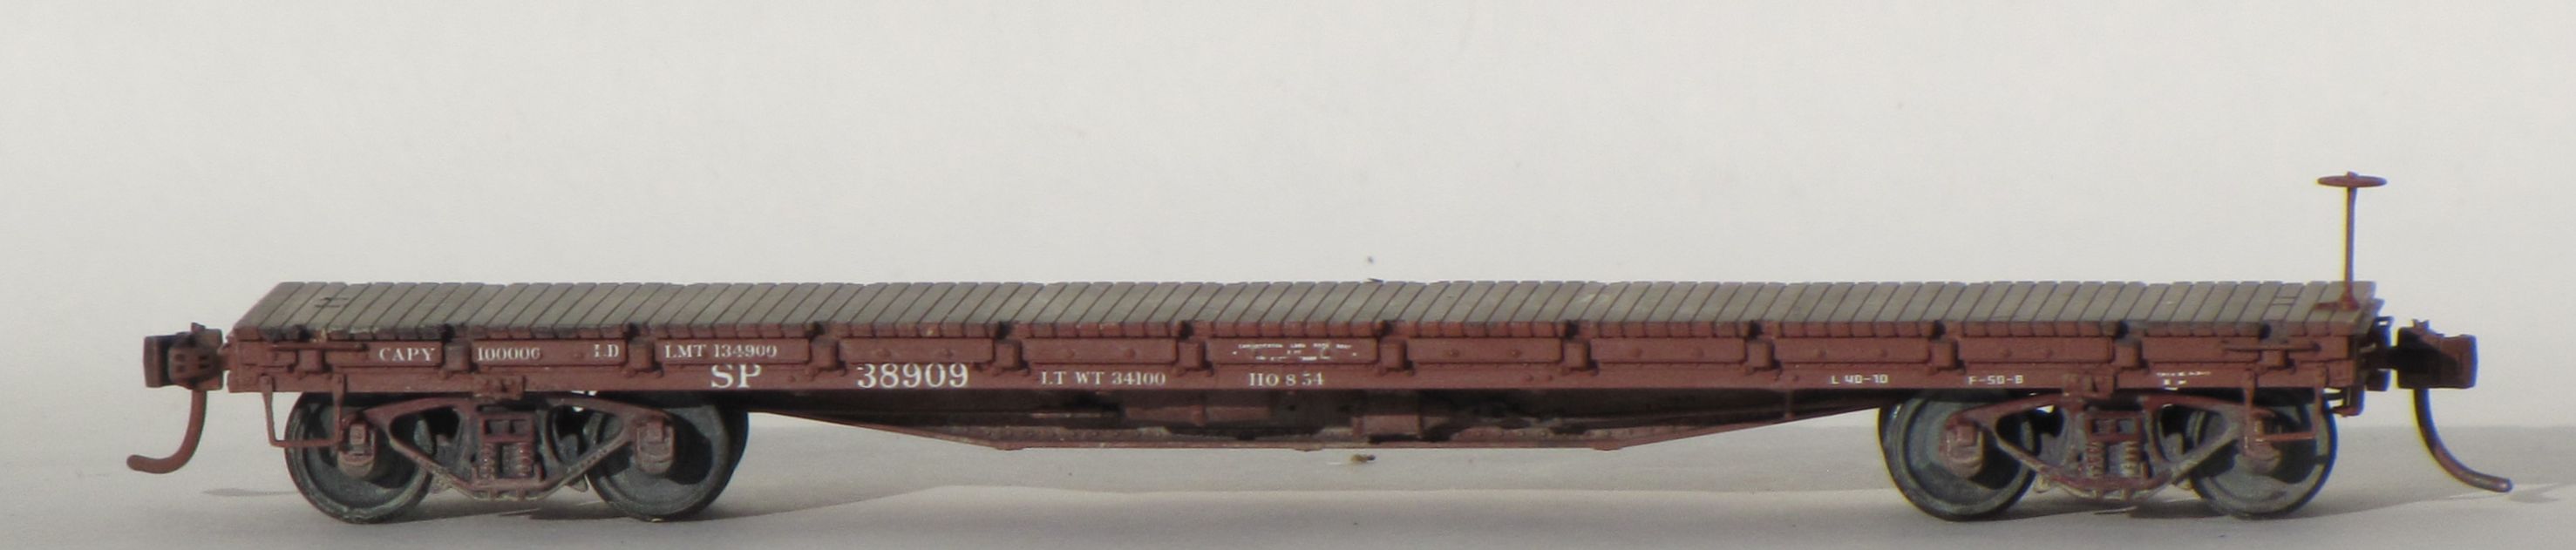
SP 38909, an ex-PE F-50-8, with dusty Khaki dry brush weathering on the lower parts of the trucks, sides, and underframe details. Grimy black-brown color has also been used on the wheel faces. This model started as Kit #2003 with U-section trucks.
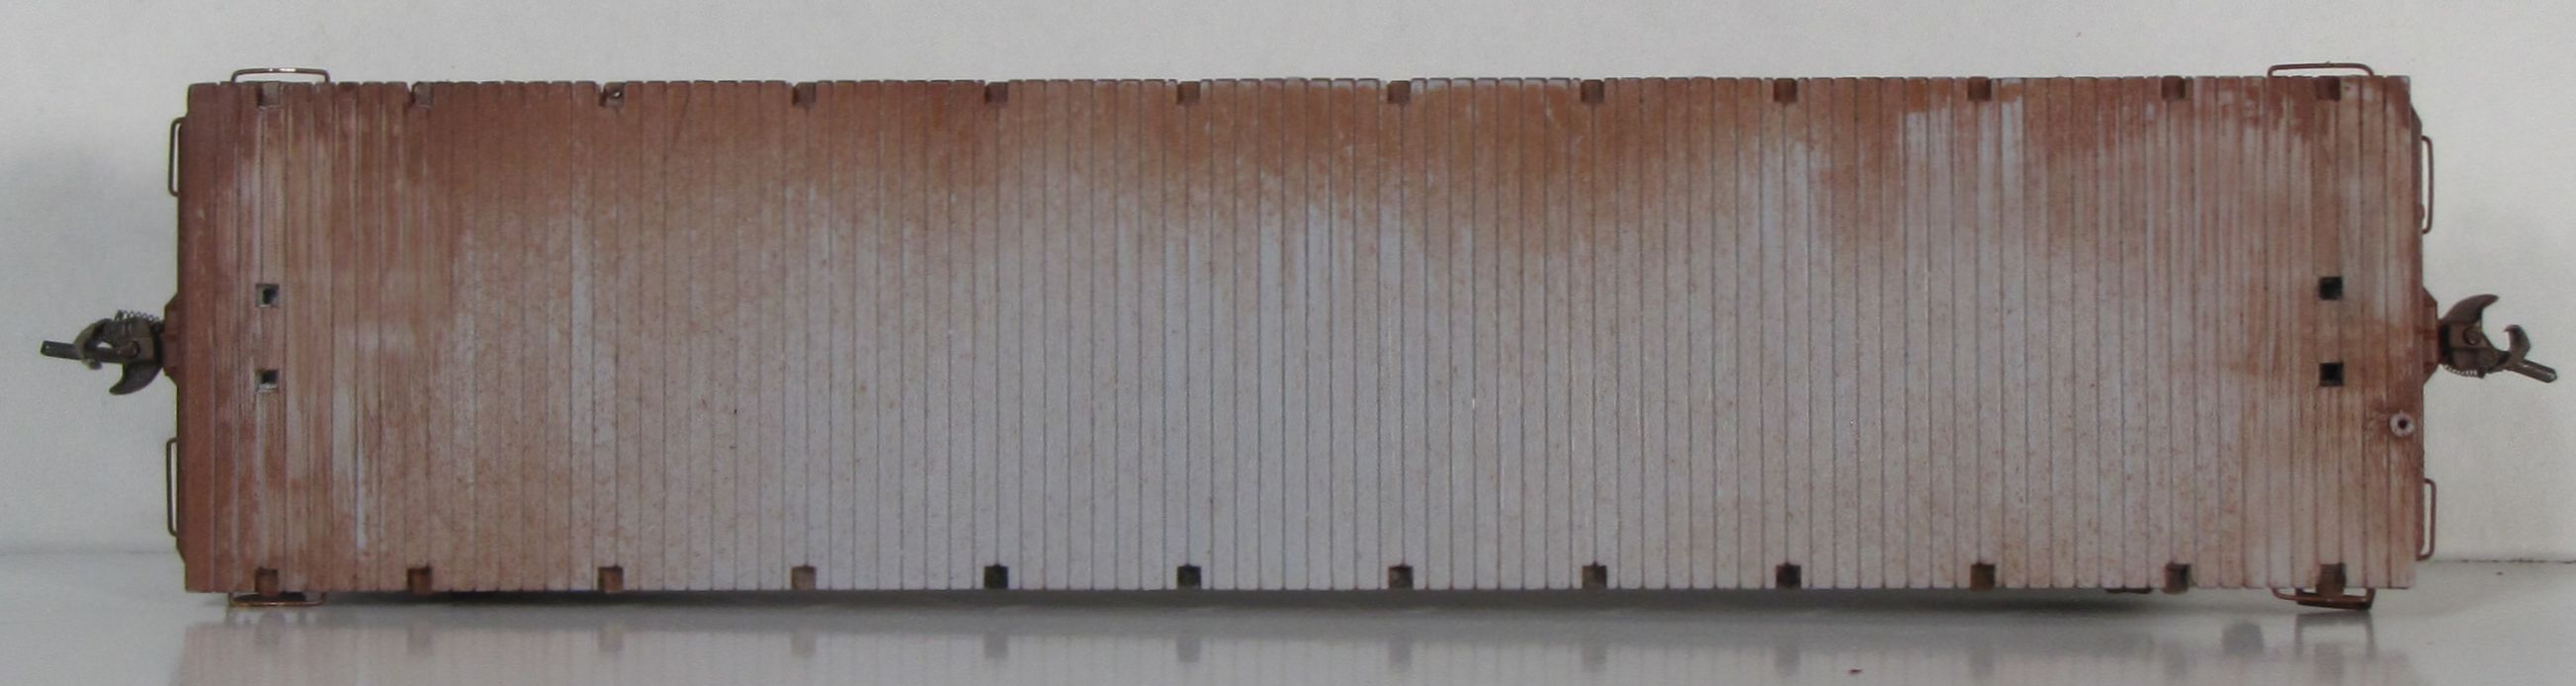
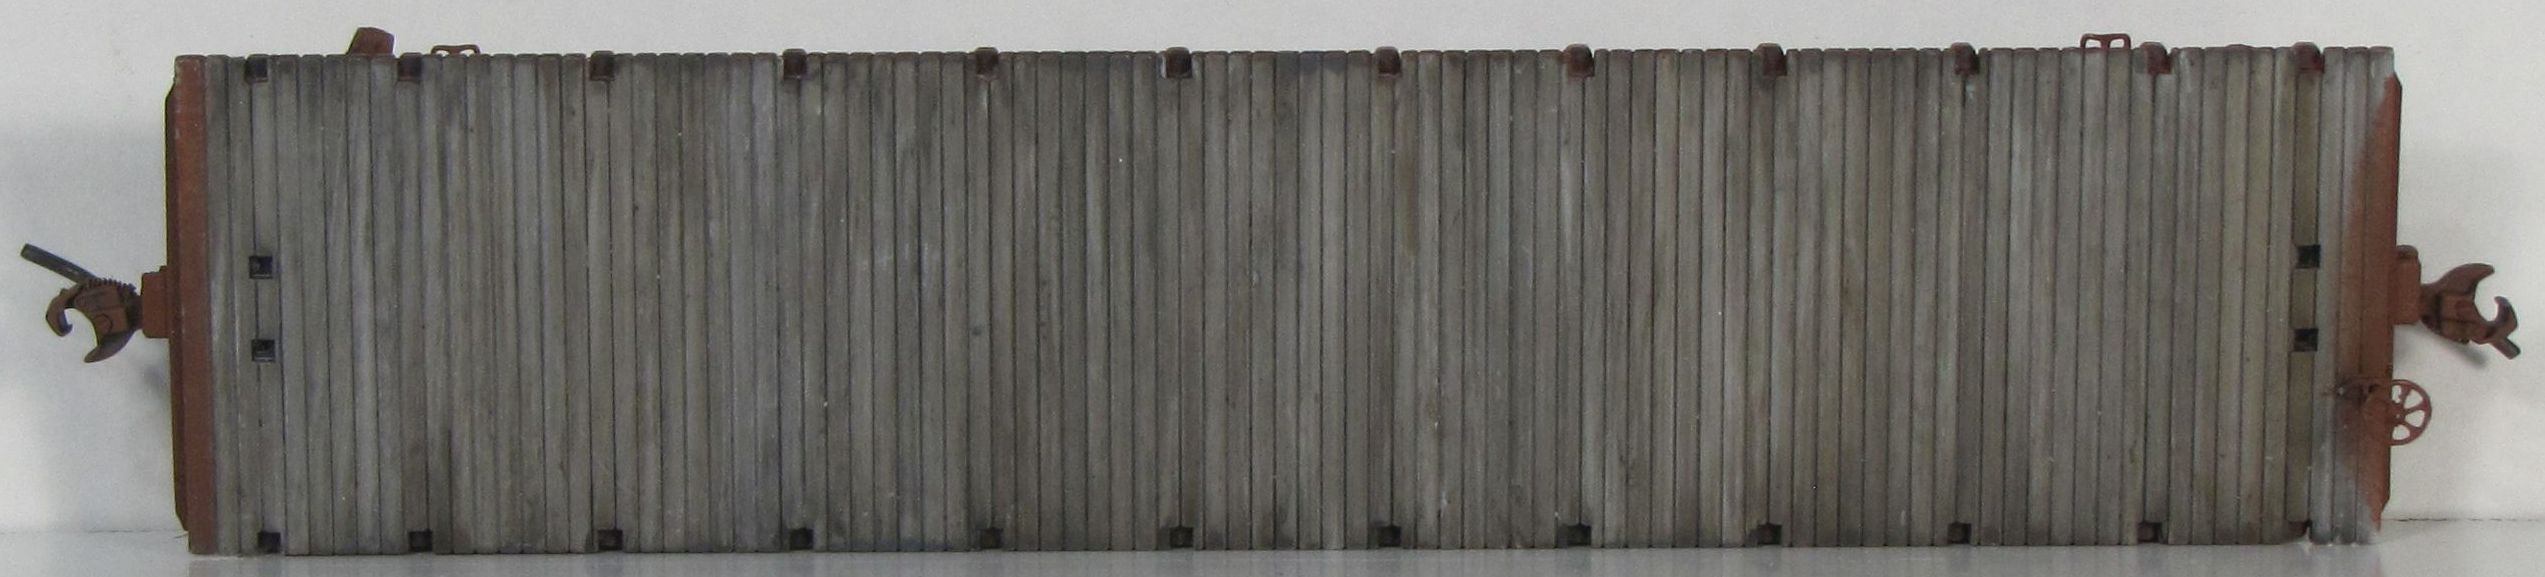
Here's an example of a finished deck that has been weathered with several layers of acrylic paint, using various amounts of 'wet' and 'dry' brushing techniques and darker washes to darken the lines between the boards.
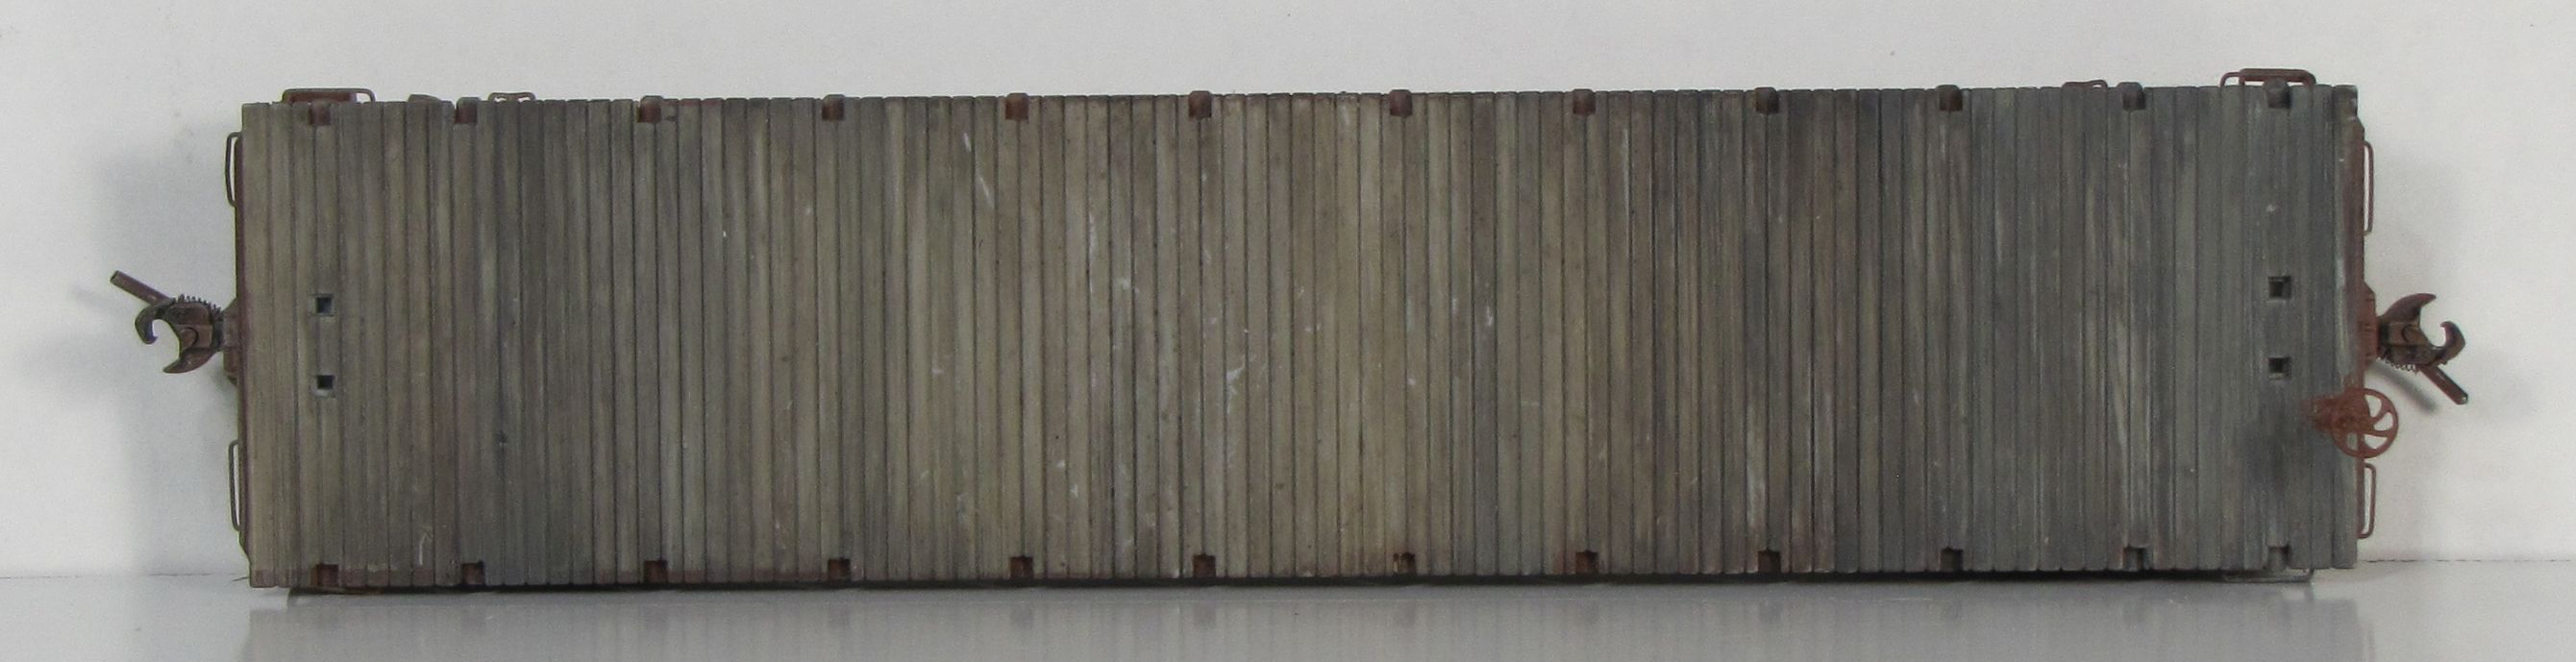
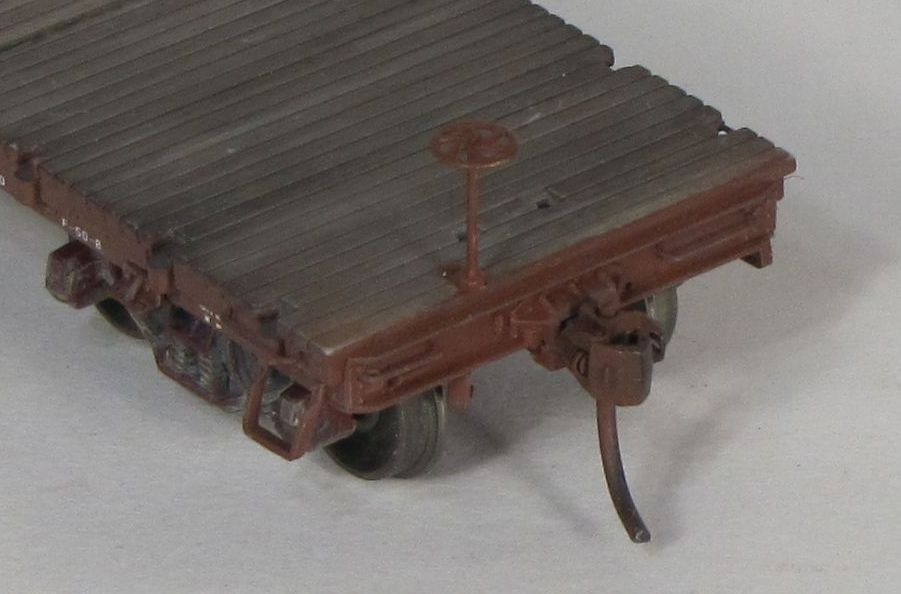
A deck about to be weathered with some FCR overspray around some of the edges. Some boards have been lightly scratched to show some cracking and damage.
As the weathering is added to the deck, the overspray will become partly covered and the center will be a lighter and more worn gray color. The acrylics work well with a brush, and by pre-wetting the deck with water and then keeping the paint fairly thick (not adding much water) on the brush, the paint can be streaked onto the deck boards. In some cases, it may be desirable to only paint one board at a time and allow the paint to streak out to a 'dry' brush near the middle or far side of the car. Use these techniques to create variations for each board or group of boards.
The basic colors used are fairly inexpensive AppleBarrel brand Brown Oxide (20511E), Melted Chocolate (20258E) and Khaki (21390E) from Walmart at only $0.50 per bottle. Browns also used include PollyScale Roof Brown and Engine Black. Any acrylic black and shades of brown could also be used.
Also while streaking the deck, think about what loads might have been on the car in the past. Did a load leak? Did it leave extra oil on the deck? Was it a crawler tractor, possibly leaving marks not with the grain on a board or two? Did the crew loading or unloading scrub rubber off a truck tire as he turned the steering wheel? Also things like nail holes can be replicated by pressing the tip of the carbide scribe into the deck and later giving the area a black wash.
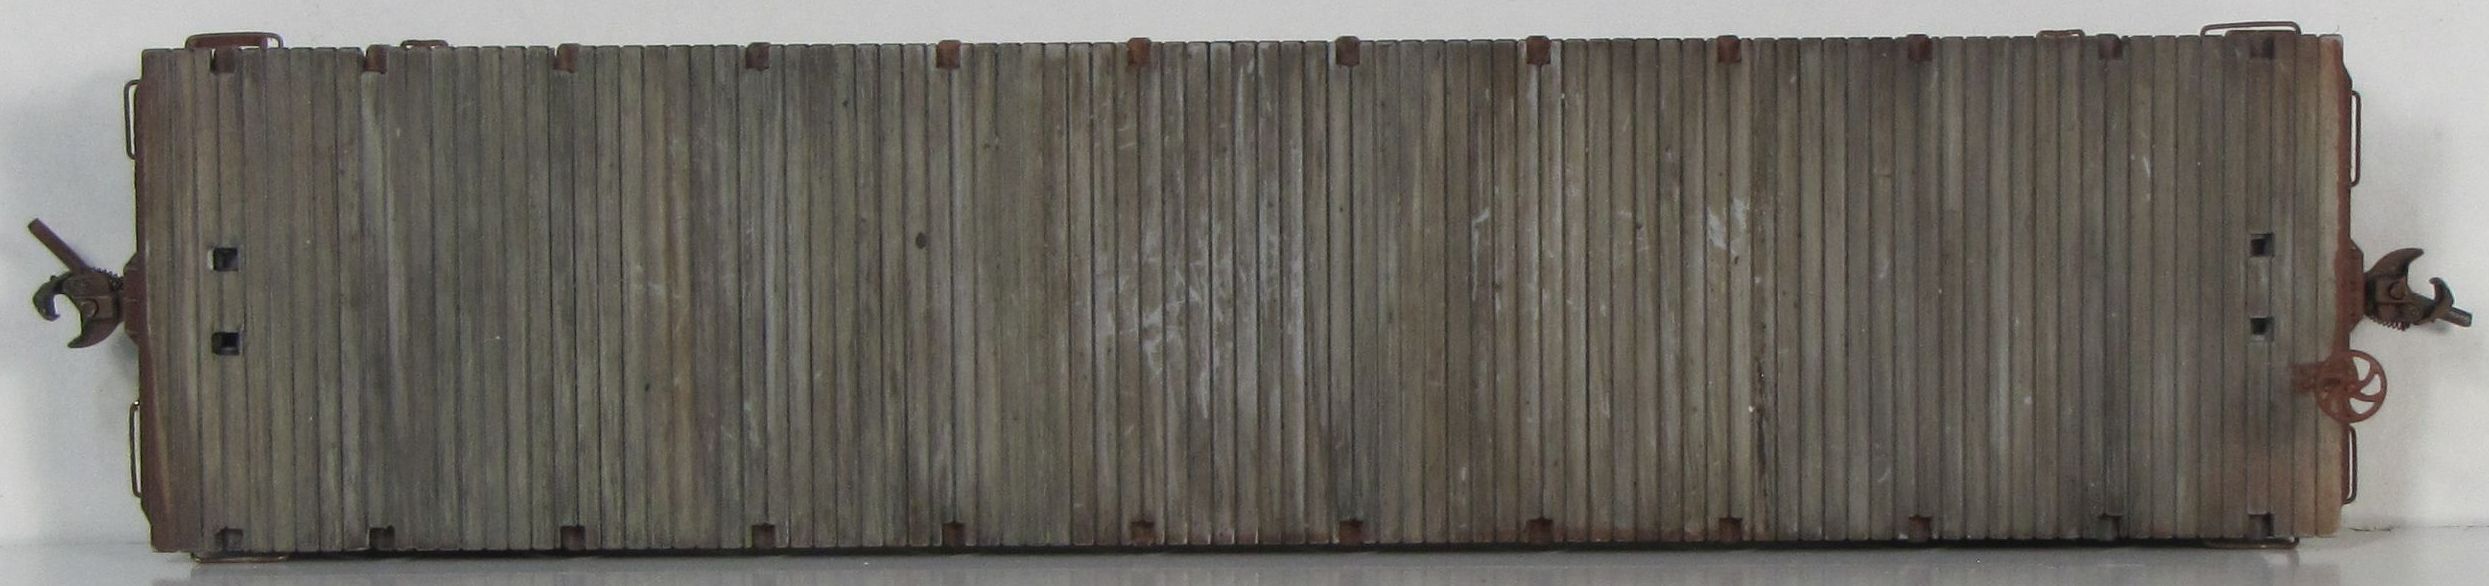
SP 38909's deck showing some various shades of brown and grays in the boards. Near the center of the deck, some of the original gray plastic is starting to flake through.
The above photo shows clearly the primary reason that OwlMtModels chose to go with neutral gray ABS deck color over the 'straw' colored plastic we use on our lumber loads. Any scratches or flaking of the weathering colors from normal use would reveal a bright tan color plastic, which is not desireable on a 5-15 year old deck. Handling the completed model it is therefore, more believable that any scratches or knicks in an older weathered deck would be a dull neutral gray color.
SP 43745's deck shows some other medium tans on its boards with the usual variations. A few boards show some black and brown Prisma Pencil weathering as well, which has also been blended lightly with a finger tip.
SP 38892's deck shows a more blended weathering than the two above, with dirt tans and the occational grayish board. A was was used with darker paint to set off the gaps between the boards.
After the variations have been added, a few highlights should be added. The Khaki color is pretty good at this, a light dry brushing in certain areas will pull the deck back from becoming totally black-brown. This should be tempered somewhat by the fact that often flatcar decks did become a blended shade of black-brown-gray depending exactly on how each board weathered. Not every board exactly the same, but also not everyboard exactly the same color. If the deck becomes too mono-tone, use the earlier techniques to add diversity. If the deck becomes too checker-boarded in appearance, use an overall wash of brown or black to change the hue and look of the deck.
PE 3474 (one of our pilot test models for the future F-50-4 project) shows some darker board variations on a deck with a more gray base color. The grayish base is achived by using less tan and brown colors over the raw plastic. Also some overspray on the ends of the deck, probably from repainting the ends of the car.
SP 38909 shows the first steps in weathering with subtle dirt and dust on the sides, underframe and trucks. Obviously this can be taken farther if desired, but this is how many of the cars in the 1940-1950s appear in photos. Not totally clean, but also not falling-apart-filthy either.
Paint the sides with appropriate Freight Car Red paint, apply glossy finish, decal, and then apply flat finish seal before weathering model. Remember that masking of certain spots such as the areas listed below which are often repainted and stenciled adds variety to your fleet of models. Once weathering is complete, remove masking, apply stencils and apply sealing flat finish to complete model.
The sides of flatcars tend to get dirty, very dirty. During the steam era and early diesel era, when these cars were in regular revenue service, journal oil often leaked out onto the wheels of passing trains and generally was slopped about. Flatcars, lacking the high superstructure, caught more than their fair share of this filth. Freight cars also could see a dusting effect of various sand colors and lighter earth-tones near the ground, which again was most of a flatcar's area of operation.
This dirt and old accumulation is balanced somewhat by the yard clerks needing to be able to read certain critical information from each car; the reporting marks, the car number, and often the last three digits from the LT WT, LD LMT, and last reweigh (or NEW date) stencils was much more recently restenciled (less than 48 months) than the rest of the lettering painted on the car. The Repack data over at the far right end of the sides also was restencilled every 4 months, so it was never very dirty. If the critical marking was unitelligible the clerks would wipe off the dirt and grime with a rag.

SPMW 1120 shows dirt and grime on the sides, underframe and trucks.
Lastly, don't forget to touch up the tops of the solid stakepockets on these models, to keep the appearance of them being open after completing your weathering.
The underframes of these cars tended to pick up all the grease, dirty, mud, slop, and dust that blew around under a moving train. Remember that modern roller bearings have cleaned up railroading a lot. Back 70-100 years ago there was a lot more grease and oil applied to anything that moved. Also the EPA wasn't around to complain about how much oil and grease flew around and landed on the track and under the car bodies. Some of the undersides of the F-50-class cars that OwlMtModels researched for this project are still to this day caked with grease and dirt/mud 'icing' over much of the floor and beams around the trucks.
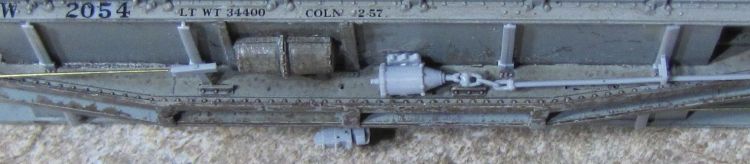
SPMW 2054's underframe with a wash of rusty grime to highlight the rivets and flange edges of the centersills. The AB Reservoir also has a coating of weathering applied. In stark contrast are the needle beams and brake parts, which are not weathered at all yet.
Toward the center of the car things are somewhat less 'caked on,' and smoother painted steel is more common. The brake rigging of course was greased at the pivots of the clevases and centersill slots for the brake levers. The brake cylinders and brake valves were checked periodically as well, or even replaced if needed. Stencils were also applied. However sometimes those didn't last very long because of the dirty conditions under the cars.
Some cars show more dusty conditions than others, so subtle dry-brushing of Khaki or sandy colors can be used to highlight the details and features of the underframe beams and brake rigging.
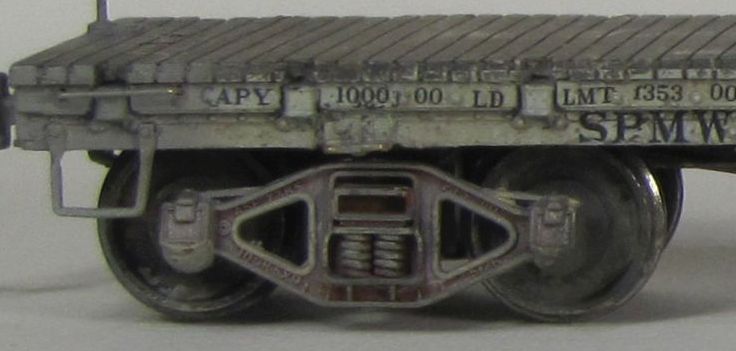
SPMW 1544 showing off the weathering effects on the details cast into the T-section trucks in its overall light gray scheme for post-1958 SPMW cars with black lettering. Also notice the weathering on the wheel faces.
Well, there seems to be a pattern forming here. The trucks where painted along with the car in later years. They tend to weather with a combination of leaked oil, grease, dust, and dirt caught in the grease and oil. Not very many cars from this era had visiably rusty orange trucks, because of all the oil products around the moving parts of the car. As the axle journal seals wore out, oil would leak onto the wheel faces, then be slung outward to the edges of the wheel catching dirt as it traveled. The springs, bolster aligning surfaces with the sideframes, and areas under the journal lids would be darker from grease and oil.
Dust from the deserts or blowing farmlands also seemed to stick to the trucks of some cars. Again, highlighting with sandy or khaki type colors with dry brushing effects replicate this well.
SP 38909's end sill and coupler painted with light weathering.
The endsills of the F-50-series cars would get oil and mud sprayed up from the wheels of the adjoining car, much like modern semi-trailer boxes do from riding stacked in well cars. This would of course be in addition to the basic weathering effects on the sides of the car.
The couplers of steam-era cars tended to be greasy and darker around the knuckle pin and uncoupling pin. The 'thumb' part of the coupler could be more 'rusty' than the knuckle side in general.